There is a plethora of sound editing software available in the market, but there is none to match the prowess of the Logic Pro X. Therefore, despite the fact that Logic Pro X has been developed by Apple for Mac users, there are plenty of Windows users who want to use this amazing software. The only problem is that they don’t know how to download and install Logic Pro in Windows 10 computer. In this tutorial, we will teach you how to achieve this objective in the simplest and fastest way possible.
Why Install Logic Pro X in Windows 10?
Users who are unfamiliar with Logic Pro X may ask why to install this software when there are so many other sound editing software available. The most impressive feature of Logic Pro is that it’s simple and easy to use and even beginners can master it in a short period of time. This software supports hundreds of musical instruments and gives you access to thousands of sound effects. He is an all-in-one music producer, who can both record and edit sounds and comes with an auto-save feature.
How to Download and Install Logic Pro in Windows 10?
Downloading and installing Logic Pro X in Windows 10 is a multi-step process. First you will have to create a virtual machine in your Windows, then install Mac OS in it and finally install Logic Pro X. The whole process may seem complicated, but if you follow the steps given below, then you can easily complete it without making any mistake.
Step 1: Download Mac OS High Sierra ISO image for Virtual Box
You can download Mac OS High Sierra for Virtual Box from this download link. This file will have a .vmdk extension. You can download the file from anywhere, but make sure that it has the correct extension.
After downloading the file, extract it into a folder that is easy to locate as you will be visiting this folder soon.
Step 2: Check and Enable Virtualization in your Windows 10
Virtualization features must be active on your computer before you can create a virtual machine. To check whether this feature is active or not, you must follow the steps given below.
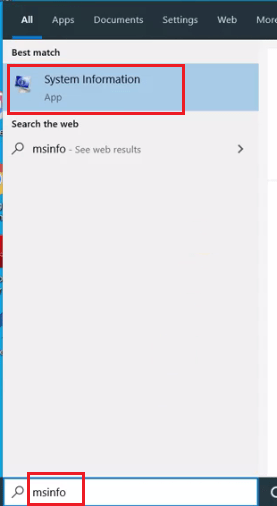
- Search ‘msinfo’ in search box and choose ‘System Information’.
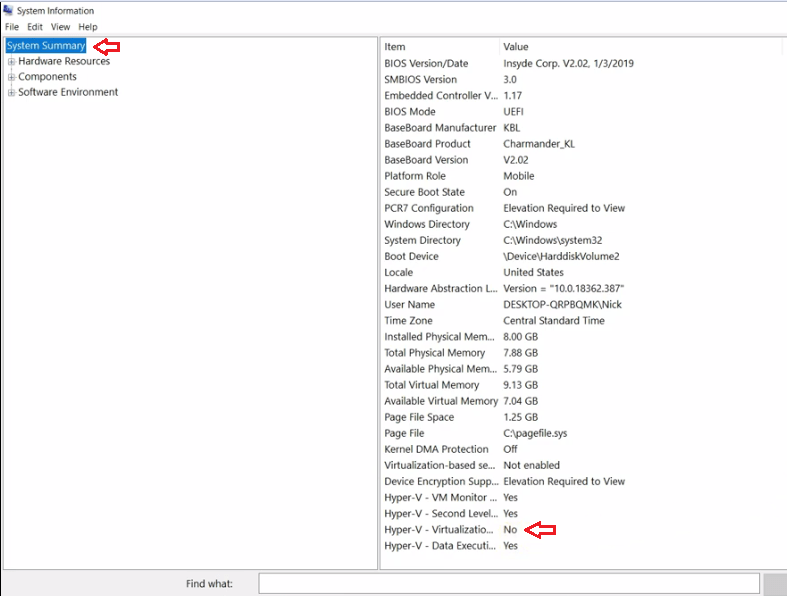
- From the list of items in the System Summary, locate ‘Virtualization’ and check whether ‘Yes’ or ‘No’ is written in front of it. Yes means virtualization is active and No means it’s deactivated.
- You can activate virtualization in your PC BIOS. Follow the steps given below to activate this feature.
- Restart your computer and press the key that takes you to your PC BIO. This key can be F1, F2, F4, Esc or Delete depending on your computer.
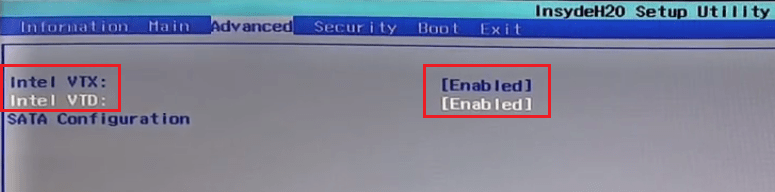
- Inside BIOS settings, look for CPU configuration items. It can be listed under Chipset, Advanced, Northbridge or Processor. In our case, it’s listed under the ‘Advanced‘ option.
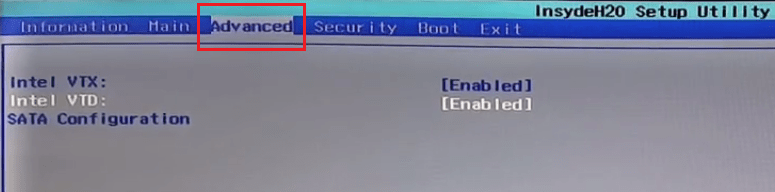
- To enable virtualization, you will have to enable options such as AMD-v, Intel VT-d, Intel VT-x, SVM, AMD IOMMU or Vanderpool. In our case, its Intel VTX and Intel VTD. We have enabled both the options.
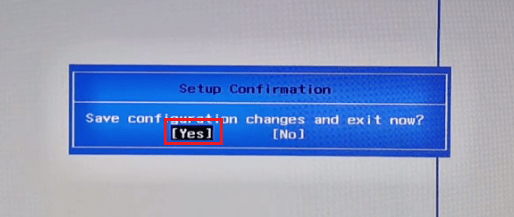
- Save the changes by pressing the F10 key in your BIOS and rebooting your computer.
- Recheck in System Information whether virtualization has been activated or not. Once activated, move to the next step.
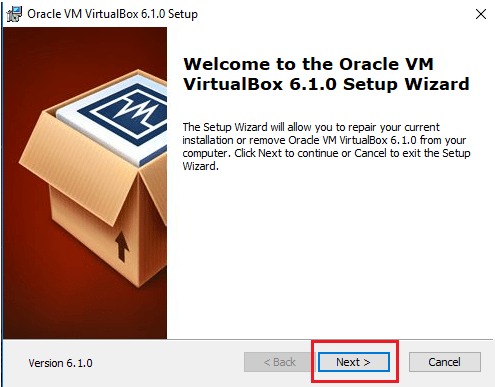
Step 3: Download and Install Virtual Box
You will have to install Virtual Box in Windows 10 so that you can use Mac OS on a virtual machine.
- You can download Virtual Box by clicking on this download link.
- After downloading the setup file, double click it to start the installation. Click ‘Next’ in the setup screen and proceed further to complete the installation.
Step 4: Setting-up your Virtual Machine
Follow the steps given below to setup a virtual machine using Virtual Box.
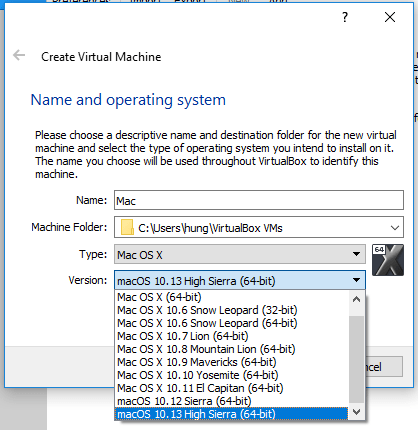
- Start Virtual Box, click ‘Machine’ and select ‘New’.

- Put a name for your virtual machine in ‘Name’ field (you will need it later). Choose version ‘macOS 10.13 High Sierra (64bit)’.
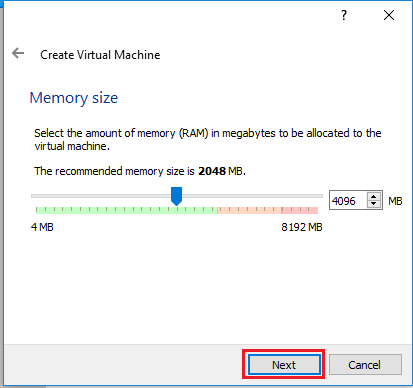
- Select the RAM size. It’s recommended to have at least 4GB RAM, but never go above 50% of your total RAM size.
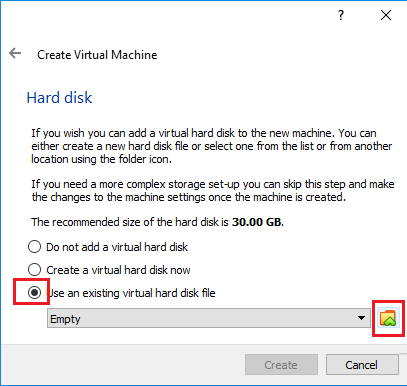
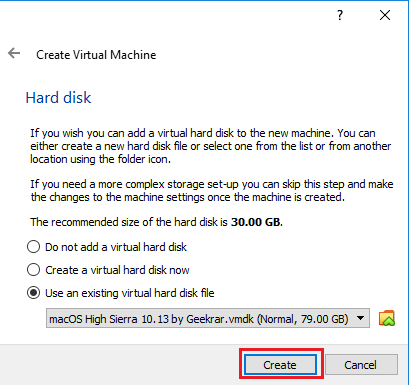
- Choose ‘‘Use an existing virtual hard disk file‘ and click ‘Folder‘ icon to browse for the file.
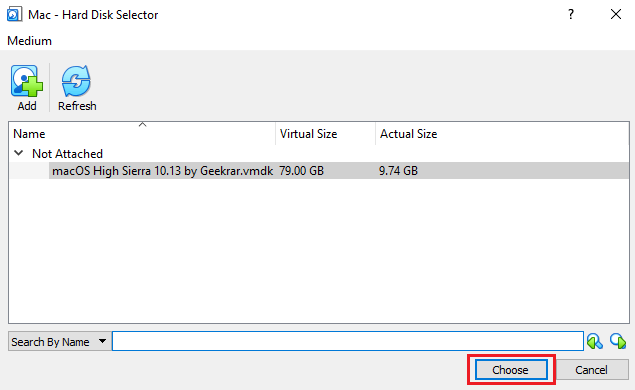
- Click on ‘Add’ button.
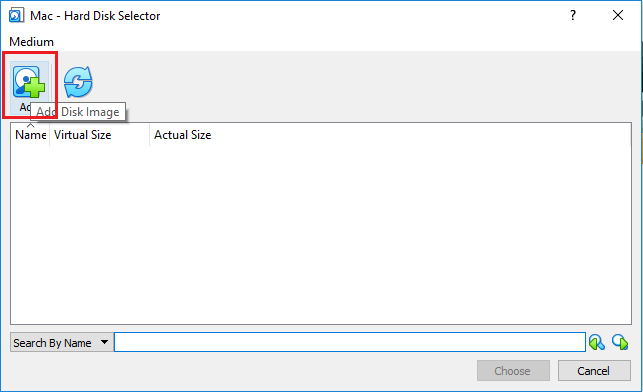
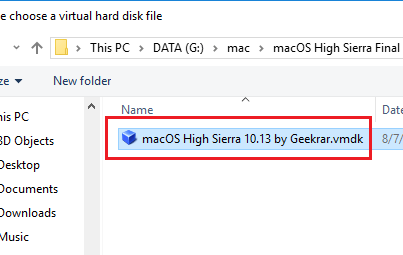
- Locate the .vdmk file you had extracted previously.
- Click ‘Choose‘ button.
- Click on ‘Create‘.
Step 5: Readying your Virtual Machine for Mac OS
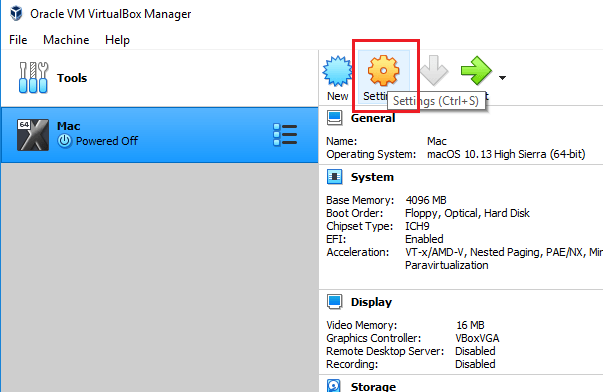
In the Virtual Box Manager, you will be able to see the virtual machine you created in the last step.
- Select your virtual machine, in this case ‘Mac’, and click ‘Settings’ button..
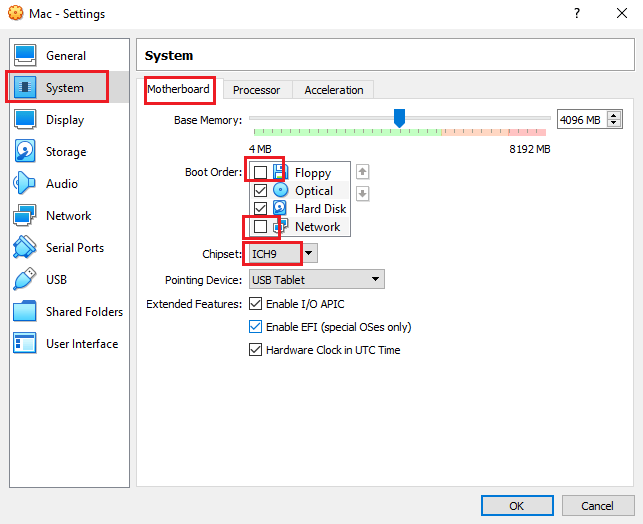
- In the System, click ‘Motherboard‘ tab, and uncheck ‘Floppy’ and ‘Network‘ options. In Chipset, choose ‘ICH9‘.
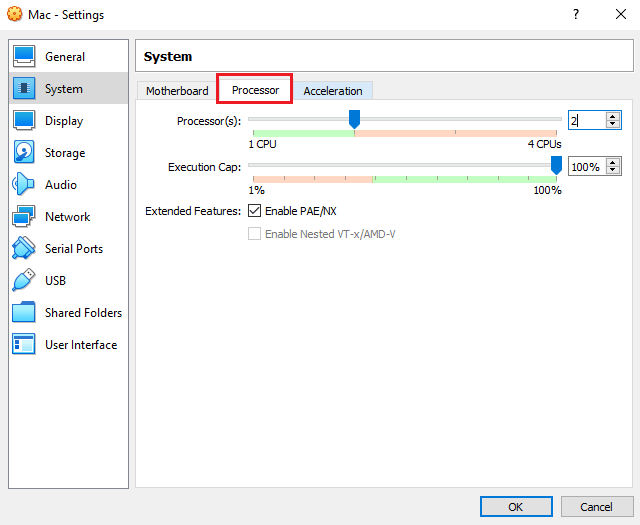
- In the Processor tab, choose at least 2, but never go more than 50% of the total processors in your real machine.
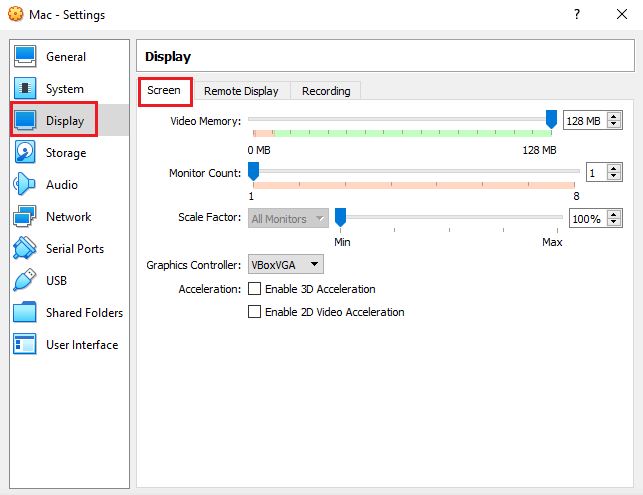
- Under the Display and under the ‘Screen‘ tab, select a video memory of 128 MB.
- Finalize all the settings by clicking ‘OK’.
Step 6: Adding Code and Installing Mac OS High Sierra
You will now have to add code to your virtual machine by using the Windows command prompt. Follow the steps given below to do this.
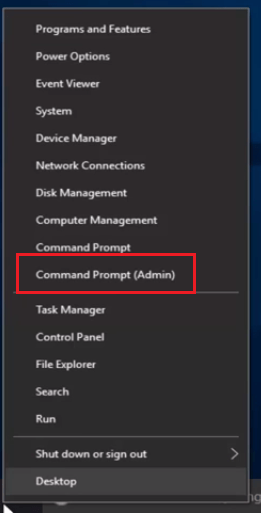
- Right click ‘Start‘ button and choose ‘Command Prompt (Admin)‘.
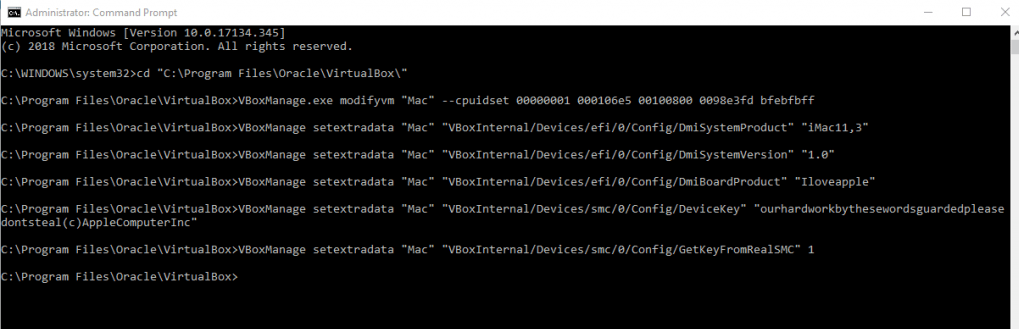
- Now enter the commands given below one-by-one in your command prompt. You can copy commands from here and paste them in your command prompt, but remember to change ‘Machine Name‘ with the name of your virtual machine. In our case, the virtual machine’s name is ‘Mac‘.cd “C:\Program Files\Oracle\VirtualBox\”
VBoxManage.exe modifyvm “Machine Name” –cpuidset 00000001 000106e5 00100800 0098e3fd bfebfbff
VBoxManage setextradata “Machine Name” “VBoxInternal/Devices/efi/0/Config/DmiSystemProduct” “iMac11,3”
VBoxManage setextradata “Machine Name” “VBoxInternal/Devices/efi/0/Config/DmiSystemVersion” “1.0”
VBoxManage setextradata “Machine Name” “VBoxInternal/Devices/efi/0/Config/DmiBoardProduct” “Iloveapple”
VBoxManage setextradata “Machine Name” “VBoxInternal/Devices/smc/0/Config/DeviceKey” “ourhardworkbythesewordsguardedpleasedontsteal(c)AppleComputerInc”
VBoxManage setextradata “Machine Name” “VBoxInternal/Devices/smc/0/Config/GetKeyFromRealSMC” 1 - Once you have entered all the code properly one-by-one, then the end result will look like the image given below.
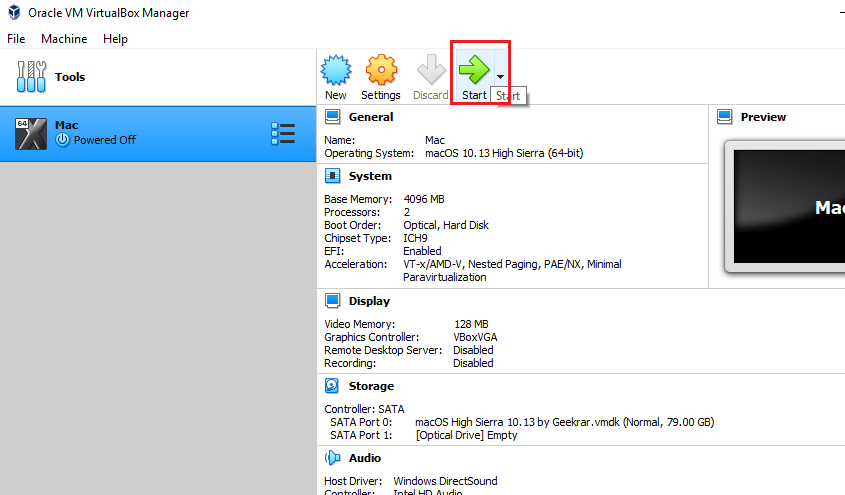
- Your virtual machine is ready for use. Click ‘Start’ button in the Virtual Box Manager.
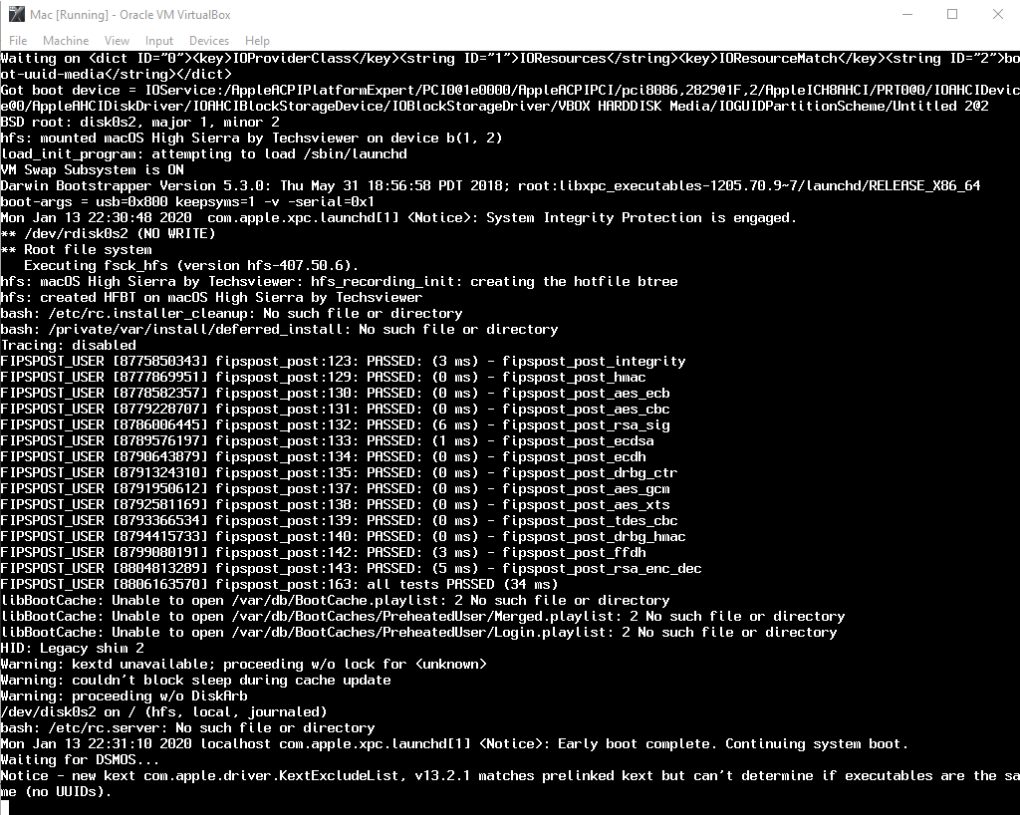
- You will see a screen similar to the image below. Please wait for some time.
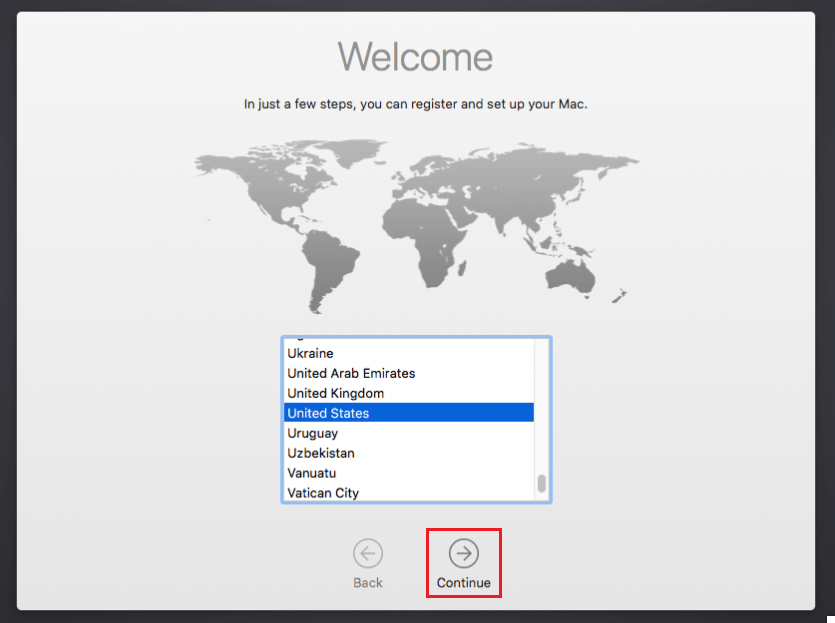
- You should now start setting up your Mac OS X. Start by selecting your country and press ‘Continue’.
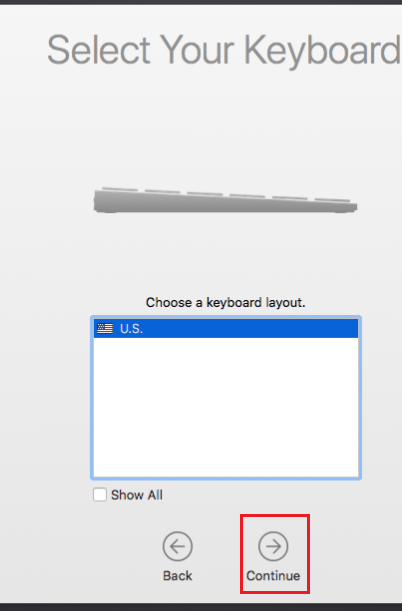
- Choose Keyboard layout and click ‘Continue’.
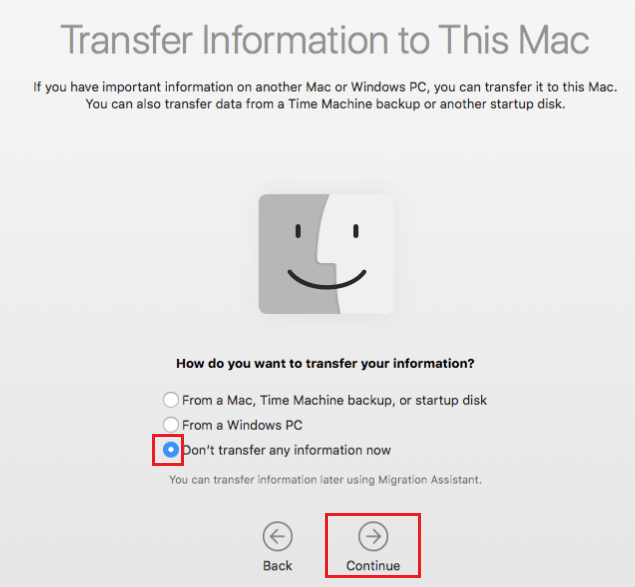
- Select ‘Don’t transfer information now‘ and click ‘Continue‘.
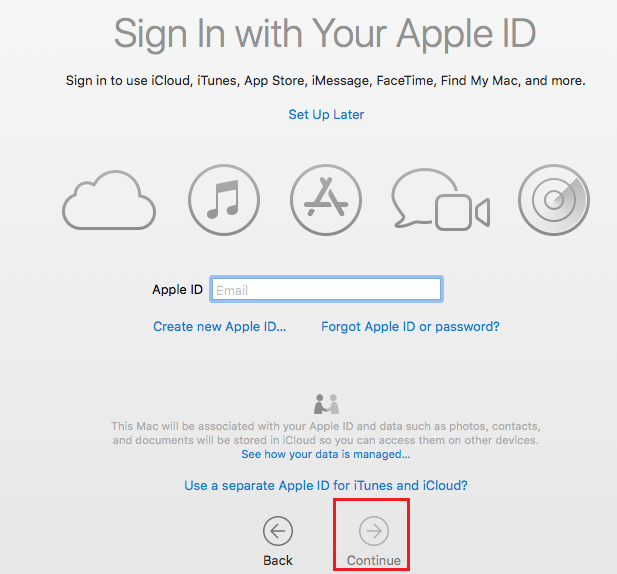
- You can choose to sign-in with your Apple ID now or you can do it later when you enter the Appstore.
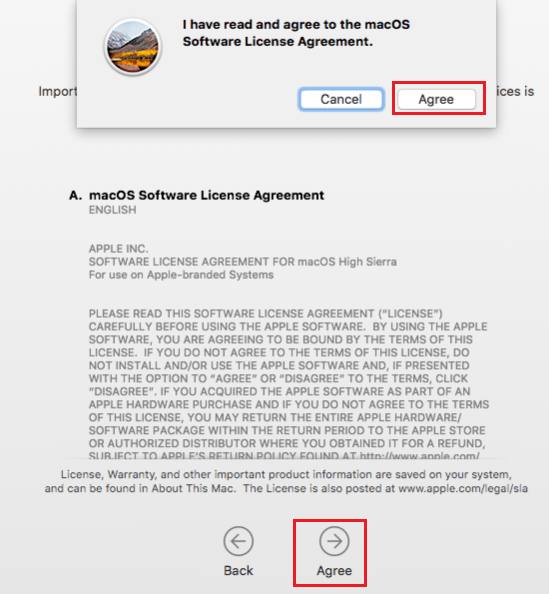
- Agree to the Apple License.
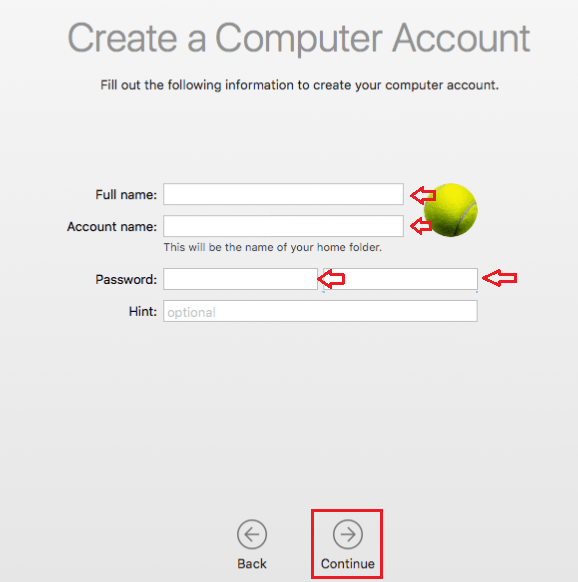
- Fill out your username and password, then click ‘Continue‘.
- That’s it, you have successfully installed Mac OS on your virtual machine.
Step 7: Installing Logic Pro X
Now it’s time to install Logic Pro X in your virtual Mac OS machine.
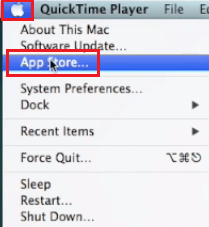
- Click Apple icon on the top-left corner and select ‘App Store‘.
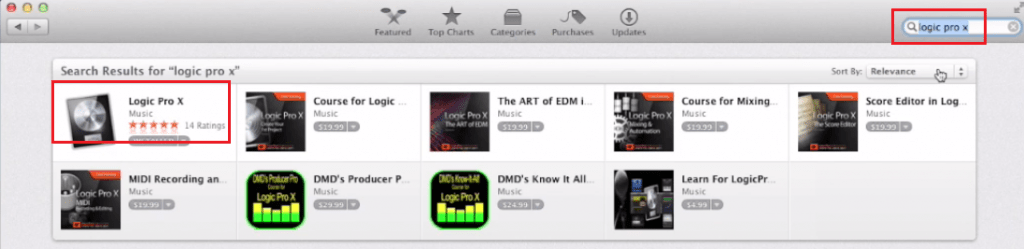
- Search ‘logic pro x’ and select ‘Logic Pro X‘ from the search results.
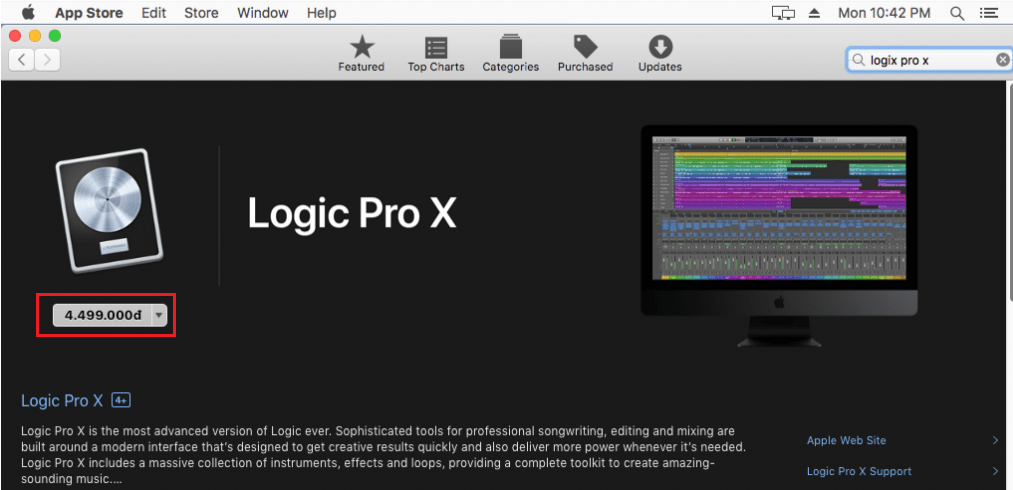
- If you have already purchased this program, then click the download button to start the download and installation of this app. If you haven’t purchased this app, then purchase it to activate the download option.
- That’s it.
My View
Several professional sound artists prefer Apple Logic Pro X for composing their music. If you are a beginner, then you will also find this application extremely useful. Don’t worry, if you have a Windows computer, because now you know how to download and install Logic Pro in Windows 10 computer.