Apple unveiled AirPods for the first time in 2016, and its demand increased rapidly as it was considered the most desirable accessory in the market. In 2019, Apple released an advanced model, AirPods Pro, with amazing features and Active Noise Cancelation.
Though Apple AirPods were designed purposely for the Apple ecosystem, the AirPods are also compatible with Microsoft windows. Here is a guide on how to connect AirPods with windows 10 devices.
To pair AirPods with windows 10, ensure they are in pair mode so that your PC can easily find them. Follow the steps below to put your AirPods into pair mode:
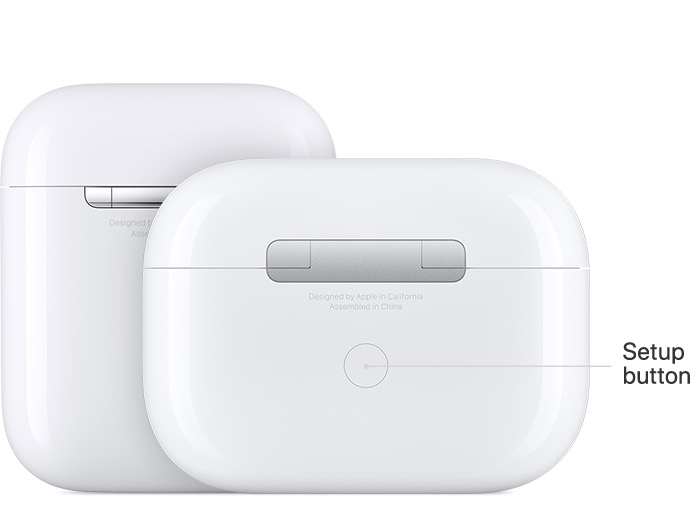
- With your AirPods in the case, open the lid.
- Underneath the case, press and hold the button until the AirPods start to glow white.
- Release the button and follow the aforementioned steps to search for AirPods on your PC.
To connect AirPods with your Windows 10, follow the following steps on your PC:
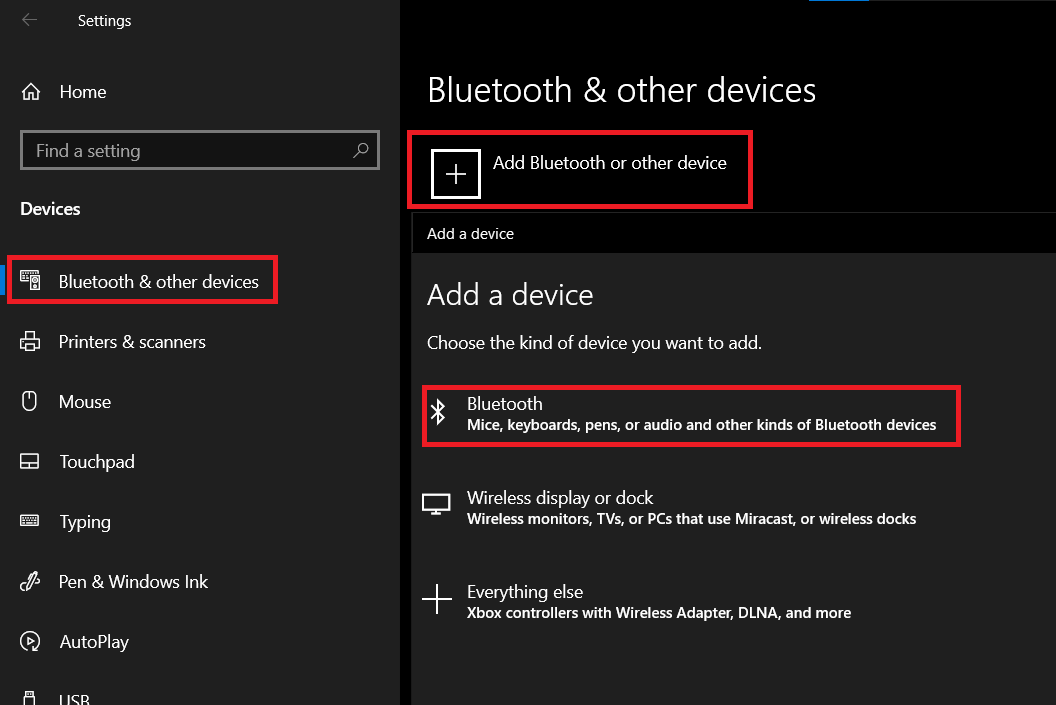
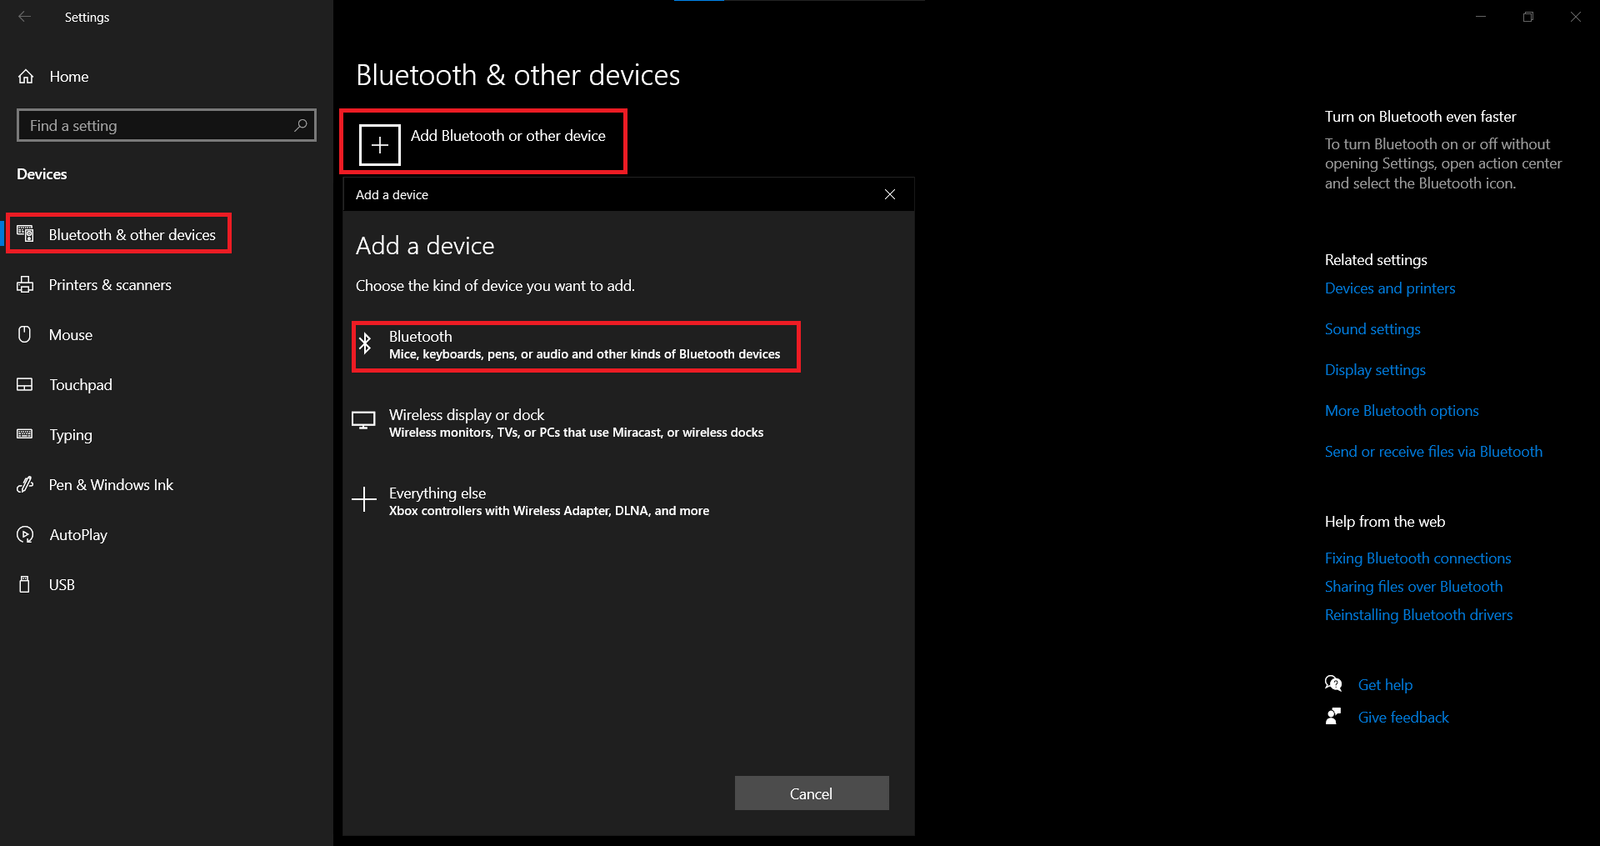
- Open the Windows Key and click on “Settings.”
- Move to Devices, Bluetooth, Add Bluetooth device.
Windows 10 will immediately search for available devices and display a list of devices within the range and ready to pair. From the list, select your AirPods, and Windows 10 will initiate the pairing process. It takes less than a minute for the windows to set up the device, and within this duration, AirPods will be ready for use.
Provided the Bluetooth devices are turned on and within the range, windows 10 typically reconnect the devices automatically. Nonetheless, if your AirPods fails to connect automatically for reasons unknown to you, go to Settings → Devices → Bluetooth and trace AirPods in the Audio subsection. Next, click AirPods, followed by “Connect” to connect once more.