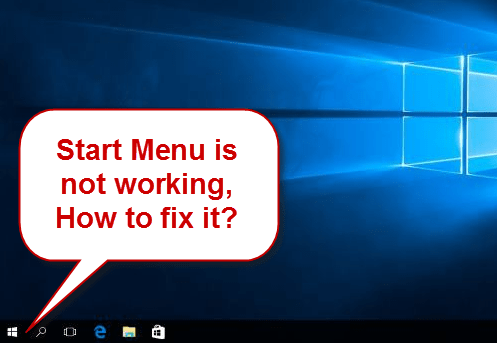
Microsoft has made a lot of improvement in its latest Windows 10 build, however, some builds of Windows 10 contains bugs. One of the bugs reported by many users is related to the Start menu which stopped working sometimes and then it does not respond at all. In this guide, we will teach you how to repair stuck start menu.
How to Fix Windows 10 start menu is not working issue
Follow the below given step by step guide to fix the start menu of Windows 10.
Method 1: Update Windows 10
As Microsoft has regular update support for Windows 10, they try to eliminate every reported bug in their next release. So, Updating Windows 10 may solve your start menu problem without going for the further fixes. To update Windows 10, follow the steps below.
- Click on start menu icon.
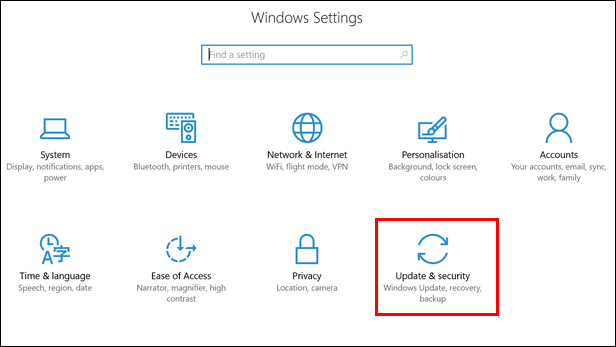
- Click on gear like icon to open settings.
- Click on Security and Updates.
 4. Click on check for updates button.
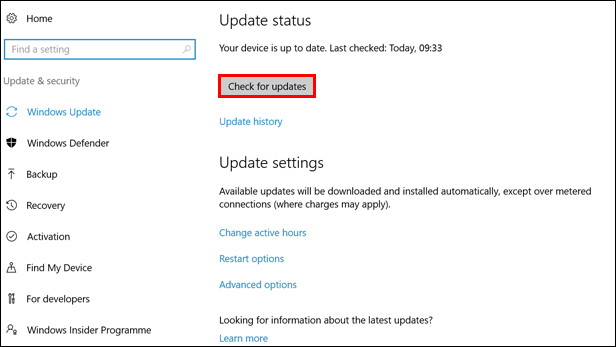 Now, if you are connected to internet, windows will start capturing updates from Microsoft. After downloading and installing updated, restart your PC and check if the start menu is working properly or not. In case, it is not responding then move to the next fixes.
Method 2: Restart Windows Explorer
This method is a quick trick to repair start menu. To restart Windows explorer, follow the steps below.
- Open task manager by pressing Alt + CTRL + Del button simultaneously.
- Click on more details in the bottom left corner. If you have already expanded task manager, skip this step.
- Click on process tab.
- Find Windows explorer process from the list and right-click on it.
- Click on Restart from the right-clicked menu.
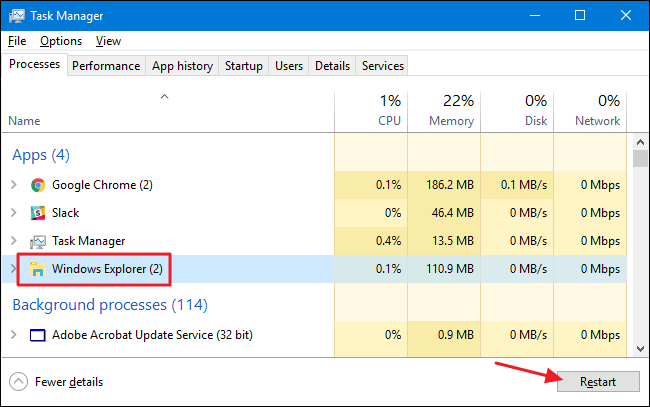
Windows Explorer will blink and restart. Check if the freezed start menu is working or not.
Method 3: Repair Windows 10 corrupted files
Corrupt files can affect the start menu of Windows 10, due to which it may stop responding upon clicking its icon or pressing windows button from keyboard. Repair Windows 10 corrupt files by following the steps below.
- Open task manager by clicking Alt + CTRL + Del button simultaneously.
- Click on File>Run new task.
- Run box will open, type Powershell and don’t forget to mark the box that says “Create this task with administrative privileges”, as it opens the Powershell with administrator privileges.
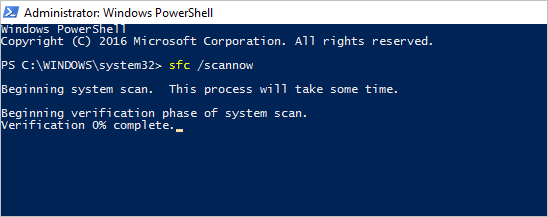
- In the PowerShell, type sfc/scannow. It will scan windows for the corrupted files. Do not lose patience because it can take some time to complete the scan.
- Now check the results, if it says “Resource Protection found corrupt files but was unable to fix some (or all) of them”, this means yes, corrupt files are there and you need to move to the next step to repair them. If the result is not this statement, then windows do not contain corrupt files, you can exit from here.
- Type DISM /Online /Cleanup-Image /RestoreHealth in the PowerShell and press enter. It will take some time to repair the Windows 10 corrupted files.
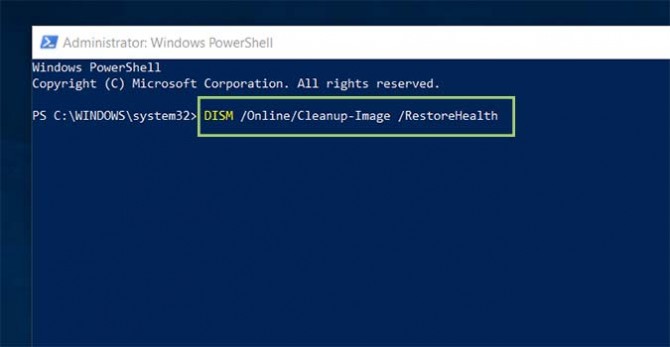
- After the repair process is completed, check if the start menu is working or not.
Method 4: Create a new user account
Creating a new user account is also a shortcut method to get rid of start menu problems rather than reinstalling Windows or all apps. To create a new user account, simply open Run through task manager File → Run new task, tick the box for admin rights. Type PowerShell and press enter. In the PowerShell, type net user Username Password /add. Where Username is the new username of the account to be created and a password is the new password for its welcome screen.

Now, log in through the newly created account and check if start menu is working or not.
Method 5: Try Microsoft Start menu troubleshooter Download
You can download start menu troubleshooter from Microsoft from the link below.