Once Search9+ infection enters your computer, it starts spoiling your web surfing experience. The disruptions it creates are highly annoying, but most users have no idea what to do to get rid of Search9+ from their computer. Therefore, to help such users, we have created this removal guide so that they can learn how to remove Search9+ from their computer.
What is Search9+?
Search9+ is an adware infection. This infection is not highly dangerous for the safety of your computer other than the fact that it makes your computer vulnerable to other more dangerous infections. Most annoying thing about this infection is that it changes the start page, search engine of your browsers, alters the bookmarks list, slows down the browser functionality and constantly redirects you to malicious websites when you are surfing the internet. This adware can also collect your sensitive data and share it with third party apps. However, you can easily eliminate Search9+ from your computer by using the process described below.
How Search9+ Entered Your Computer?
Most probably this infection entered your computer when you were installing a third party software that was bundled with this adware. You unknowingly installed this infection on your computer and now you are witnessing all these web surfing problems. Now the best way forward is to follow the removal method given below to completely get rid of Search9+ from your computer.
How to Prevent Entry of Search9+?
You can prevent the entry of this adware on your computer if you take some precautionary measures. For example, when installing a software you should carefully check the additional programs it will be installing on your computer. Also, install a reputed antivirus and anti-malware on your computer and regularly scan your computer with them.
How to Remove Search9+?
First you need to uninstall Search9+ program from your computer and after that you must remove its entries from your browser so that you can fully restore your web surfing experience.
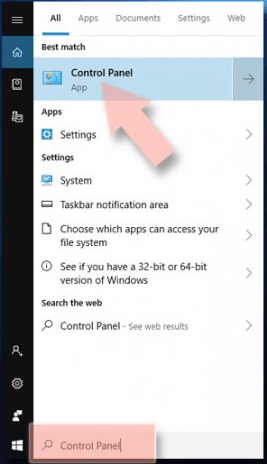
1. Search ‘Control Panel’ in the Task Bar and select ‘Control Panel’ from results.
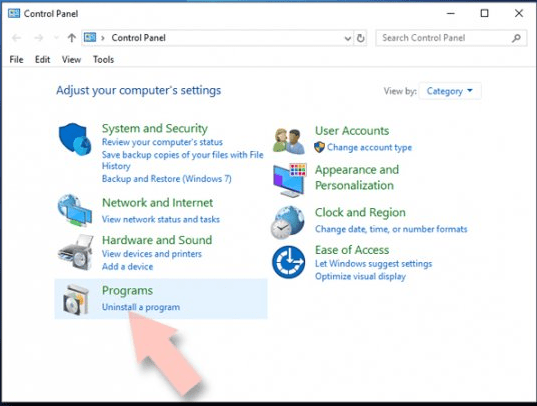
 2. In Programs section, select ‘Uninstall a program’.
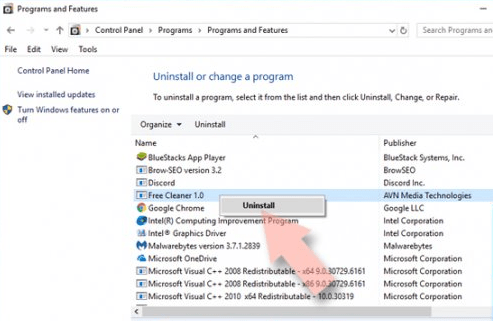
 3. In the program list, right click the suspicious application and choose ‘Uninstall’.
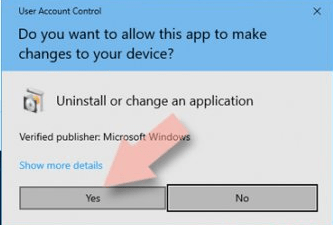
 4. Click ‘Yes’ to start the uninstall process and follow the prompts to complete the process.
 That’s it you have removed Search9+ adware from your computer. Now, you must remove its entries from your installed browsers, reset your browser home page and delete all temporary browser files.
Remove Search9+ from Internet Explorer (IE)
Remove Suspicious Add-ons:
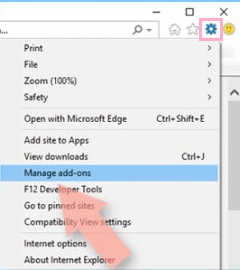
1. In IE, click ‘Gear’ icon, and select ‘Manage Add-ons’.
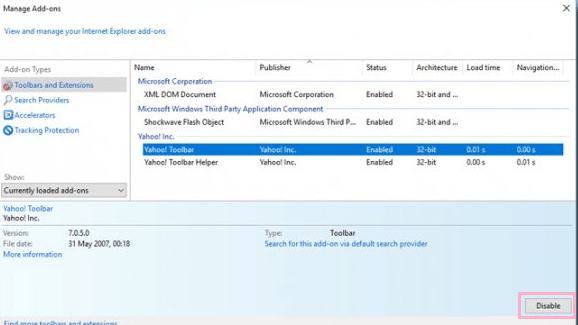
 2. In Manage Add-ons window, choose Search9+ and other suspicious add-ons and then click on ‘Disable’.
 Change Browser Homepage:
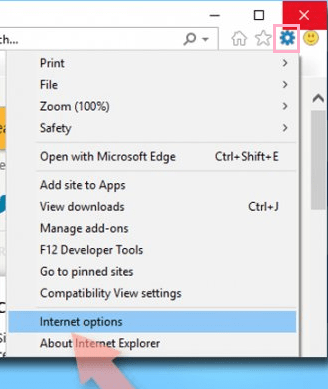
1. In IE, click ‘Gear’ icon and select ‘Internet Options’.
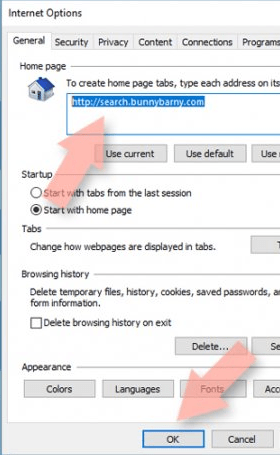
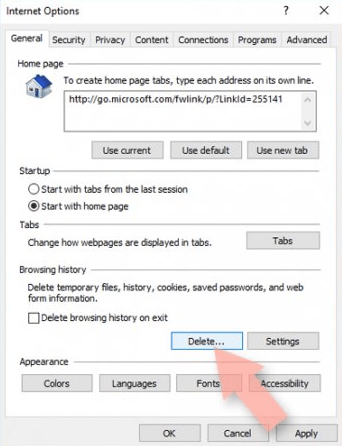
 2. In General tab, replace ‘Home page’ with your preferred website. Then, click ‘Apply’ and ‘OK’.
 Delete Temporary Files:
1. Again go to Internet Options and click on ‘Delete’ under ‘Browsing history’ section.
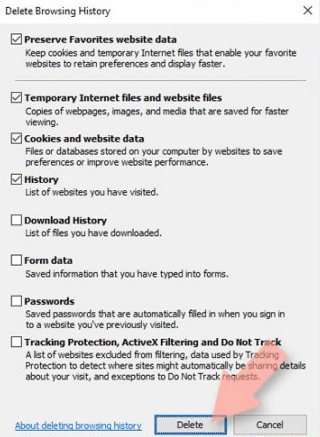
 2. In the Delete Browsing History window, choose relevant fields and click on ‘Delete’.
 Reset Browser:
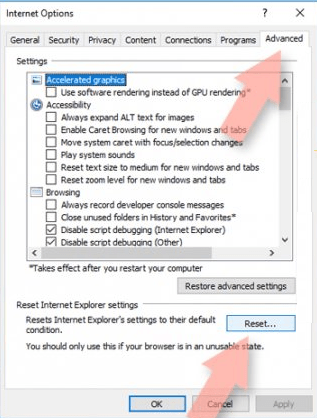
1. Go to Internet Options, select ‘Advanced’ tab and click on ‘Reset’ button.
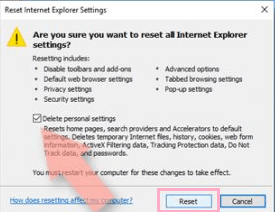
 2. Now, choose ‘Delete personal settings’ and click on ‘Reset’.
 This completes removal of Seacrh9+ adware from Internet Explorer.
Remove Search9+ from Firefox (FF)
Remove Suspicious Extensions:
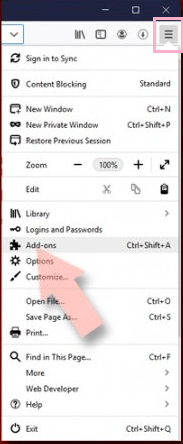
1. In FF, click Menu and select ‘Add-ons’.
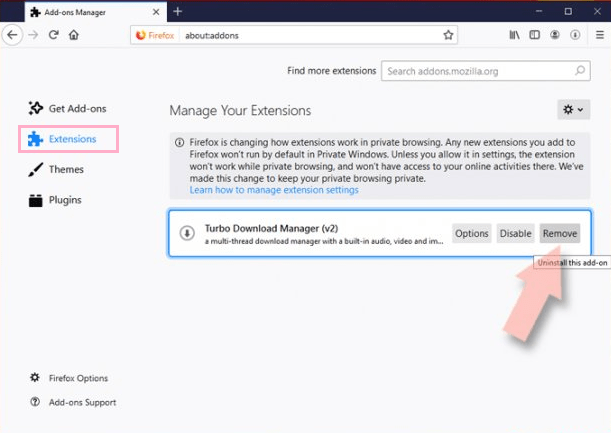
 2. Choose ‘Extensions’ option and click ‘Remove’ button in front of all the suspicious extensions.
 Delete Cookies and Site Data:
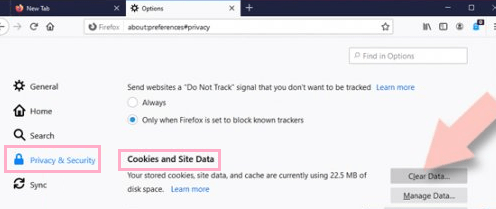
1. In Menu, click ‘Options’ and choose ‘Privacy & Security’ section. Scroll to find ‘Cookies and Site Data’, then click on ‘Clear Data’.
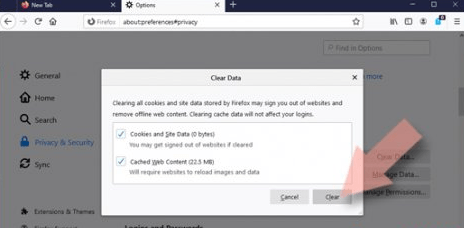
 2. Now choose ‘Cookies and Site Data’ and ‘Cached Web Content’, then click ‘Clear’ button.
 Reset Firefox Browser:
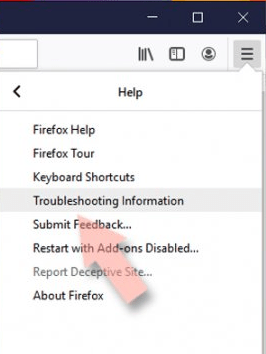
1. In FF, click Menu and choose ‘Help’.
 2. In Help, click on ‘Troubleshooting Information’.
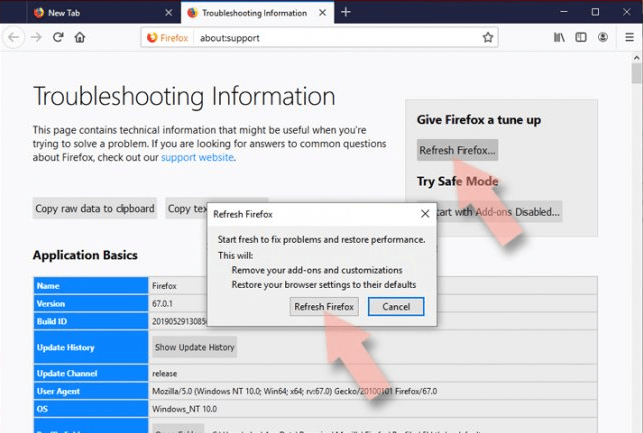
 3. Click ‘Refresh Firefox’ under ‘Give Firefox a tune up’ and in the pop-up select ‘Refresh Firefox’.
 This completes removal of Seacrh9+ adware from Firefox.
Remove Search9+ from Chrome
Remove Suspicious Extensions:
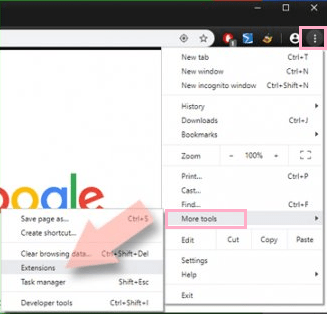
1. In Chrome, click ‘Menu’, choose ‘More tools’ and select ‘Extensions’.
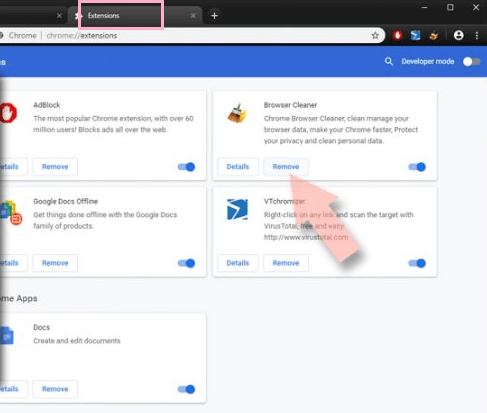
 2. Now you can see all the Extensions installed in Chrome. Click on ‘Remove’ button of all the suspicious extensions.
 Delete Cache and Web Data from Chrome:
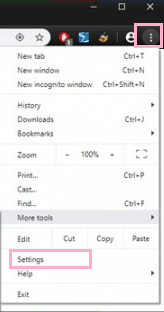
1. In Chrome Menu, choose ‘Settings’.
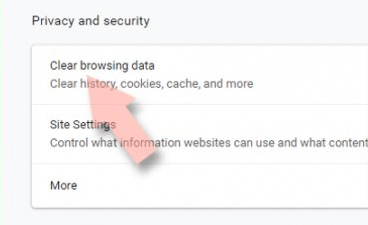
 2. Click on ‘Clear browsing data’ under ‘Privacy and security’.
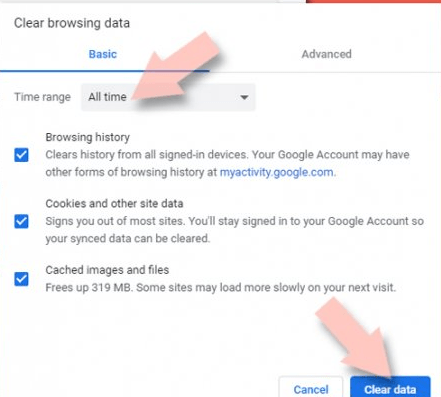
 3. Now choose ‘Browsing history’, ‘Cookies and other site data’ and ‘Cached images and files’. Then ‘Clear Data’.
 Eliminate Search9+ Components from Chrome:
1. In Chrome Menu, choose ‘Settings’.
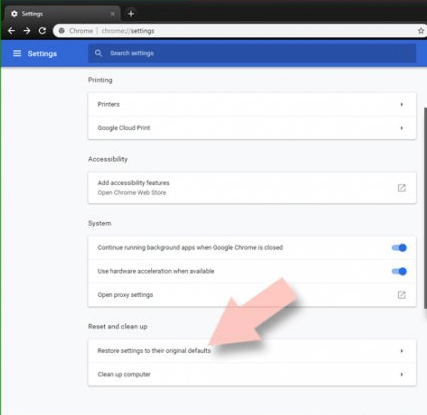
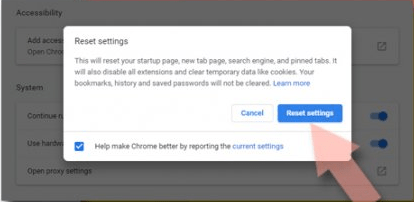
2. In Settings, find ‘Advanced’ and click on it. Then, scroll to ‘Reset and clean up’ and click ‘Restore settings to their original defaults’.
 3. Click on ‘Reset settings’.
 This completes removal of Seacrh9+ adware from Google Chrome.
Conclusion
In this guide we have clearly described how to remove Search9+ from your computer. After removing the infected app you must remove its entries from various installed browsers. The removal process may look lengthy, but you must perform it in its entirety if you want to make sure that this adware doesn’t reappear on your computer again. Also, follow the precautions mentioned above.