The integrated webcam of a laptop is not the best webcam for use. However, it saves you from the effort of carrying a webcam all the time and comes in handy when you want to have a sudden video chat. Therefore, when this camera stops working it’s a matter of concern, especially if you are a frequent traveler. In this guide, we will describe multiple methods which you can use to fix the built-in camera on your laptop if it’s not working properly.

Fix: Laptop Camera Is Not Working
We will describe five methods to fix this problem. You should try these methods one-by-one and we are quite sure that you will be able to fix your non-working laptop webcam.
Method 1 – Enable Camera Using Keyboard
Many laptops have a security option to block its integrated webcam with just one touch of a key. This feature has been introduced by manufacturers to protect users from camera hacking. However, sometimes users press that key by mistake and end-up blocking their camera. Try to enable your camera by using this method.
- Press the webcam key on your keyboard. It can be any key from F1 to F12 function keys. In some cases you may have a press a combination of keys, like Fn + F2, Fn + F5, etc. Locate this key on your laptop and press it once. After that check whether your integrated camera is working or not.
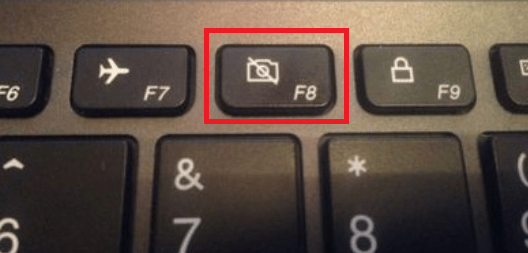
If you don’t have such a key on your laptop, then skip this method.
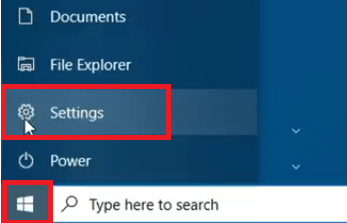
Method 2 – Verify Privacy Settings of Camera
Windows 10 gives you the option to block the use of your camera on certain selected applications or to block it altogether for all apps. To check if your camera has full access to all the necessary applications, you should follow the steps given below.
- Click ‘Start’ button and choose ‘Settings’ from the options.
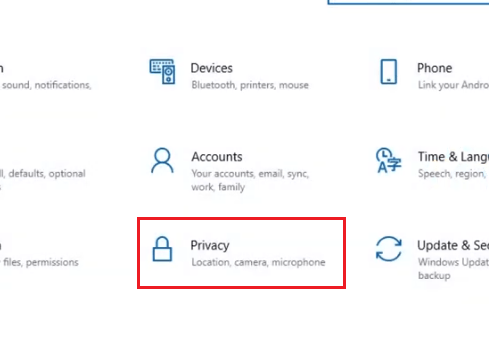
- On the Settings page, click the “Privacy” option.
- On Privacy page, choose “Camera“.
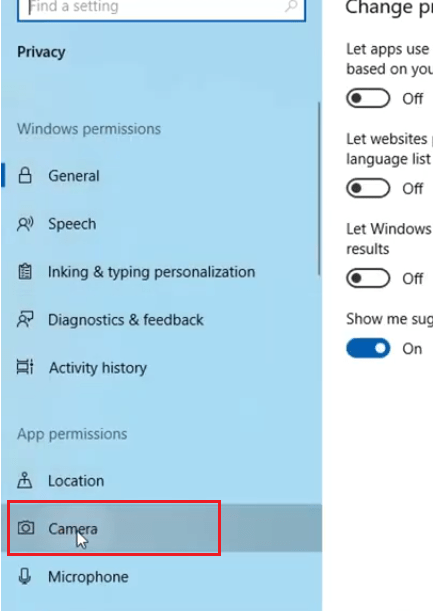
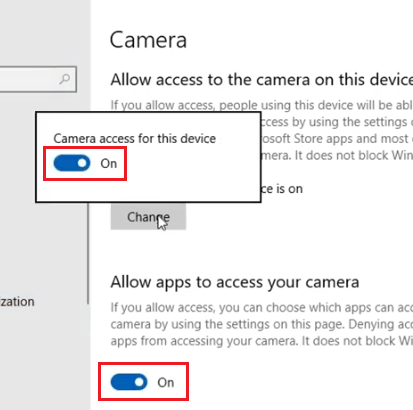
- On the Camera page, the “Allow apps to access your camera” option should be “On“. If it’s “Off“, then click the “Change” button below “Allow access to the camera on this device“.
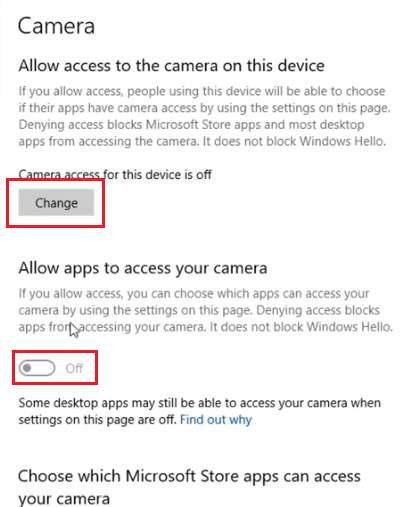
- In the upcoming pop-up, move the slider to “On” and it will turn blue.
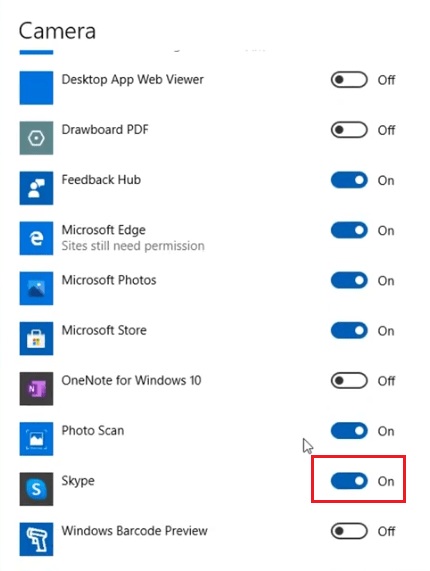
- Scroll down to the Camera page to view the list of applications that have access to the camera. On that list, make sure that the application you want to use with your camera has access to your camera. If it doesn’t have the necessary access, then move the slider to turn the access on.
- You should now try to use your webcam again. If the settings were “Off” and you just now turned them “On“, then most probably your camera should work properly. Otherwise, move to the next method.
Method 3 – Reset Your Camera
Resetting your camera will recover its original settings and it might result in restoring the original functioning of your webcam.
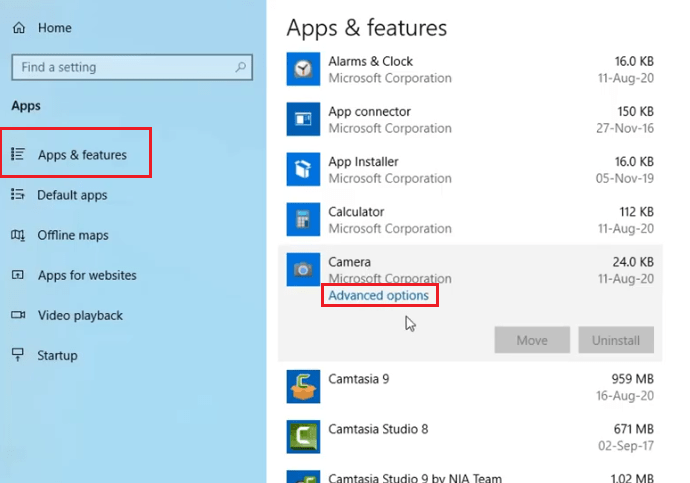
- Click ‘Start’ button and choose ‘Settings’ from the menu.
- Click ‘Apps’ on the Settings page.
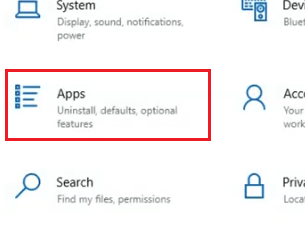
- In Apps & features section, locate and click ‘Camera’ in the list and choose ‘Advanced options’.
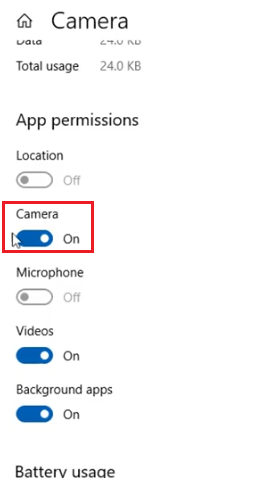
- On the Camera page, verify ‘Camera’ option is . . .On, otherwise, use the slider to turn the camera on.
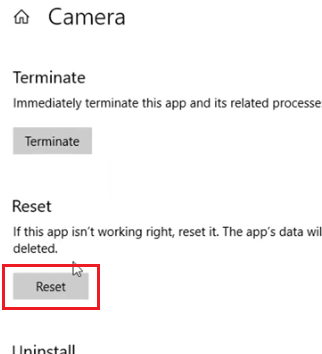
- Scroll down on the Camera page to ‘Reset’ option and click the ‘Reset’ button.
- You will be warned that the entire app data will be reset, click on “Reset“.
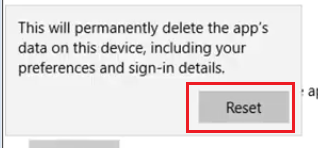
- Once the reset is complete, you will see a “Tick” sign alongside the Reset button.
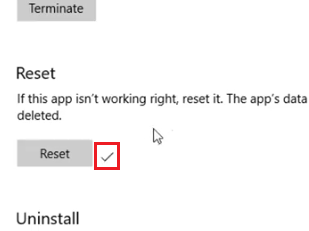
- That’s it, your camera reset was successful. Now, check your camera whether it’s working or not. If it still doesn’t work, then try the next method.
Method 4 – Reinstall Your Camera
There could be driver issues with your webcam. Maybe you have installed a new device on your computer and the drivers of that device are conflicting with your webcam drivers, or maybe old webcam drivers have gotten corrupted. You can easily resolve driver related issues by reinstalling your webcam.
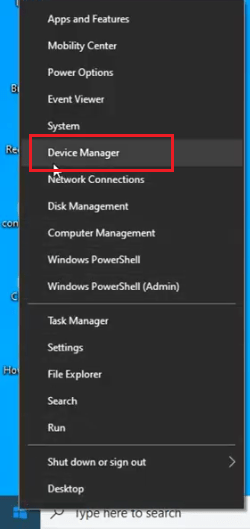
- Right-click ‘Start’ button and select ‘Device Manager’.
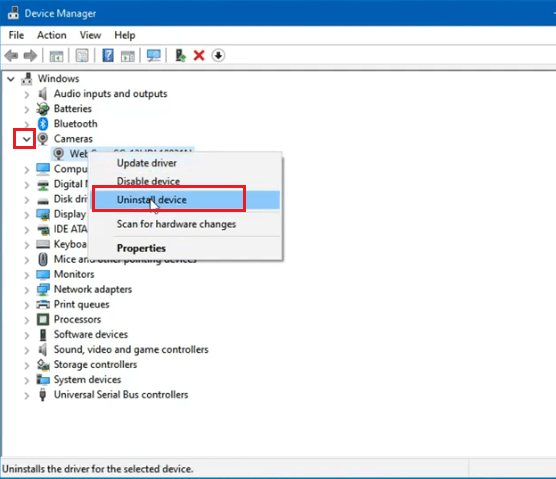
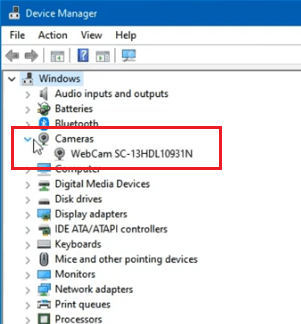
- Expand ‘Camera’ field in the list. Right-click on your webcam and choose “Uninstall device“.
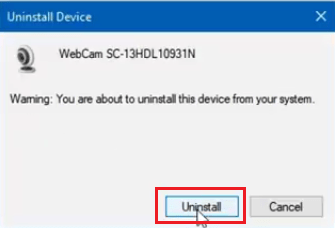
- Click “Uninstall” to start the uninstall process.
- The “Camera” field will now be removed from the list. Then, click on the “Action” option.
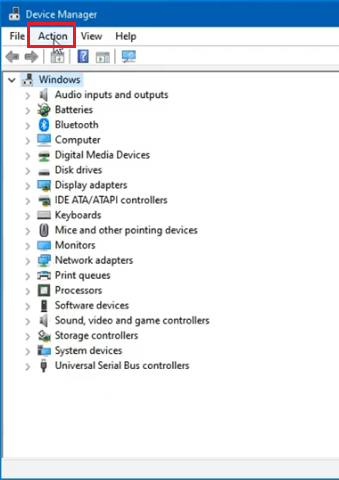
- From the drop-down, choose “Scan for hardware changes“.
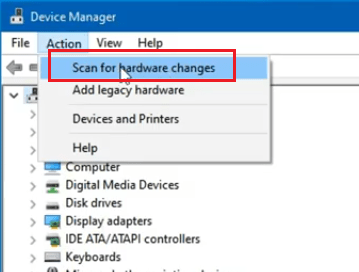
- That’s it, your webcam has been reinstalled.
- Check your webcam and it should work as expected. If it’s not working, then try the next method.
Method 5 – Delete Windows Update Cache
You should empty the Windows Update cache as it will help in resolving this issue if it has occurred due to improper Windows Update. Follow these steps to do this:
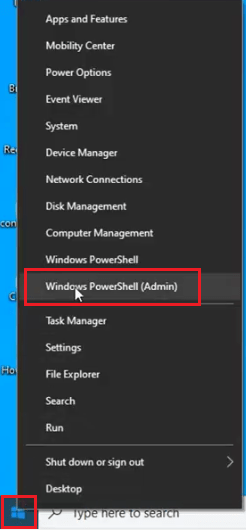
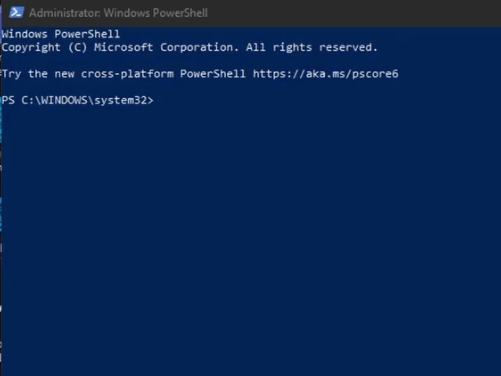
- Right-click ‘Start’ button and select ‘Windows PowerShell (Admin)’.
- In the PowerShell window, make sure you are in ‘system32’ folder.
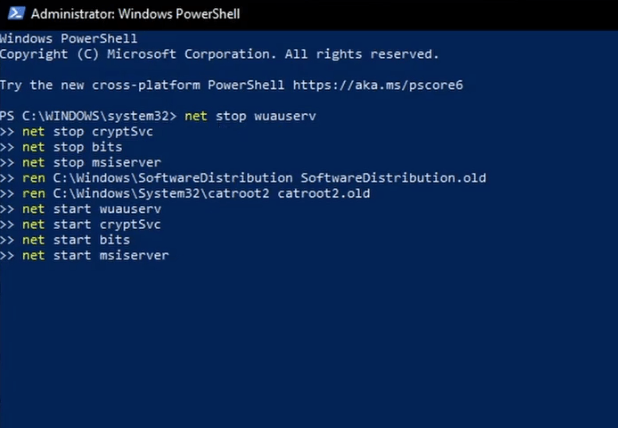
- Paste the commands given below and press “Enter“.
net stop wuauserv
net stop cryptSvc
net stop bits
net stop msiserver
ren C:\Windows\SoftwareDistribution SoftwareDistribution.old
ren C:\Windows\System32\catroot2 catroot2.old
net start wuauserv
net start cryptSvc
net start bits
net start msiserver
- When ‘system32’ appears again. Close the PowerShell and restart your computer.
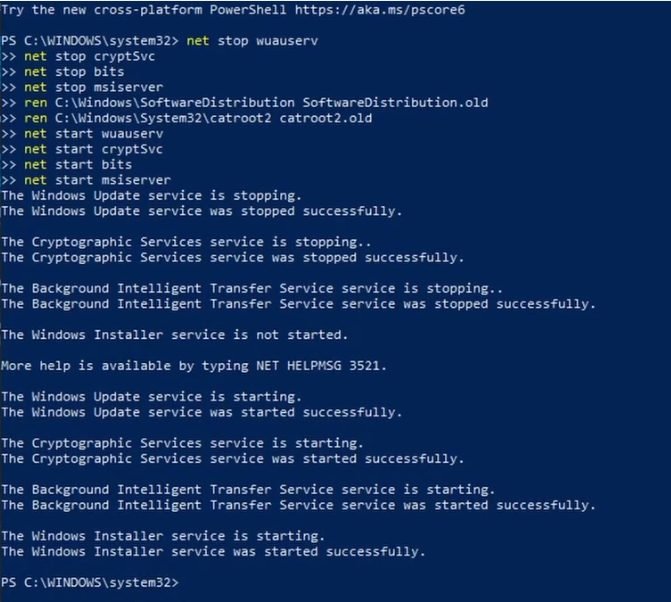
- Check if your webcam issue has been resolved or not.
Many users ask, laptop’s built-in camera is not working, how do I fix it? We have tried to answer this question by describing some highly effective methods. If none of the above methods solve your problem, then maybe the problem is related to hardware. Get your laptop checked by a hardware engineer.